Raw Printing From Windows XP - Zebra Network Printer
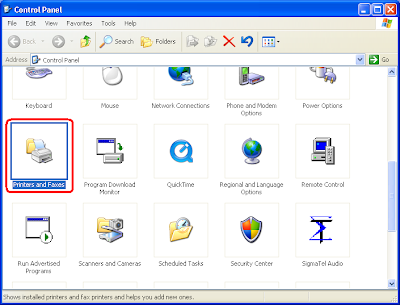
- Open Control Panel. Click "Printers and Faxes"
- Click "Add Printer"

- Click "Next" at the welcome screen.

- Click "Local printer attached to this computer" and deselect "Automatically detect and install...". Click "Next".

- Click "Create New Port" and from the drop-down select "Standard TCP/IP" port.

- At the Port Wizard Welcome screen click "Next"

- For Printer Name or IP Address, put the hostname or IP of your printer and click "Next"

- If prompted for a Device Type, select "Generic Network Card". Click "Next".

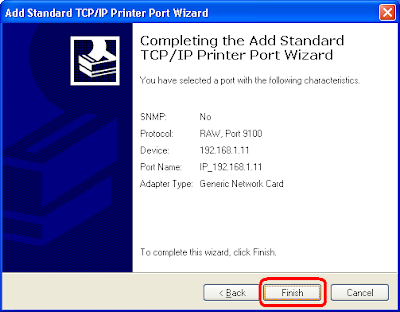
- A summary page will display with your port information. Click "Finish".
- The Printer Wizard will continue. When prompted for Manufacturer, click "Generic". For printer, select "Generic/Text Only". Click "Next".

- If prompted to keep the driver, click "Keep the existing driver". Click "Next".

- Type the printer name you'd like to use. For example, "zebra". It will ask to use this printer as the default printer. Click "No". Click "Next".

- When prompted to share the printer, click "Do not share this printer". This setting can be changed later if needed.

- You will be prompted to print a test page. Click "No" and click "Next".

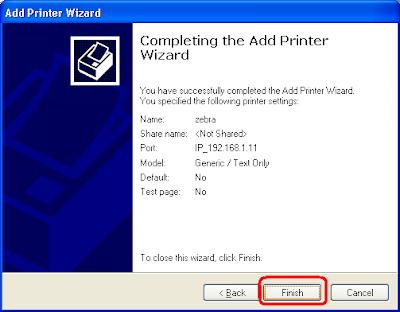
- The wizard summary page will appear. Click "Finish"
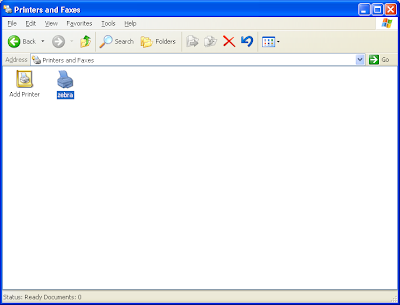
- Your printer will now list under "Printers and Faxes"
- Troubleshooting: (If problems exist) Make sure the new port (under the new printer properties --> ports --> find your new port --> configure port) is set to "RAW" under protocol. If printing to a non-standard port (other than 9100) adjust the port settings correctly.
- End of Steps


-Tres


Comments